Repairing a puncture in the field is not the same as repairing one at home
 Save
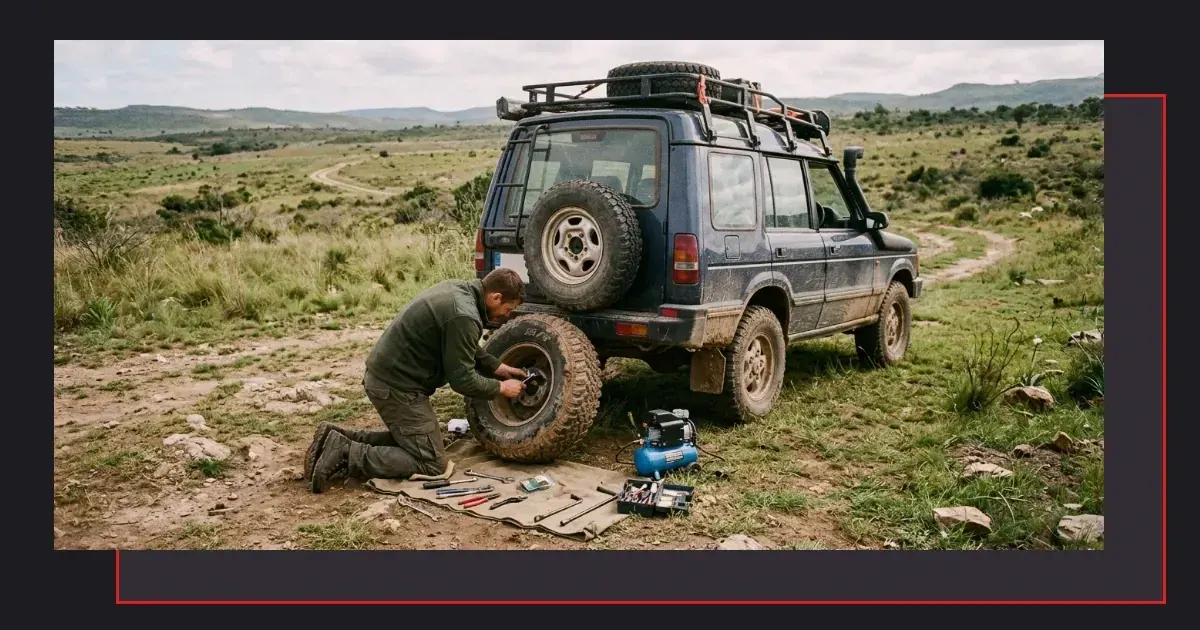
A puncture repair in the field gets the tyre holding air long enough to reach help or finish the journey. Cox Morgan Overland walks through plug insertion, the conditions under which a plug is safe to continue on, and the signs that tell you a full repair or replacement is the only sensible choice. The rest of this guide covers what happens during a field repair, the tools that belong in the vehicle and the judgement calls that matter when assistance is distant.
A plug is a temporary seal, not a permanent fix
The rubber plug fills the hole from the outside and relies on friction against the tyre carcass to stay in place. It stops air leaving but does not restore the structural integrity of the tyre. The cords inside remain damaged where the puncture occurred, and the plug itself can work loose under heavy load or high speed.
A full repair involves a patch applied to the inside of the tyre after the puncture has been cleaned and prepared. The patch bonds to the rubber and spreads the load across a wider area. A plug inserted from the roadside does not do this.
Treat every plug as provisional. It holds long enough to reach a workshop or continue at reduced speed, but it is not the same repair a tyre technician would perform with the tyre off the rim.
What a plug insertion involves
The process is straightforward but demands care at each step. Rushing any part increases the chance the plug fails before it has done its job.
- Locate the puncture: spray soapy water over the tread and sidewall until bubbles show where air escapes; a slow leak may take time to reveal itself.
- Ream the hole: use the barbed reamer from the kit to clean and slightly enlarge the puncture, working it in and out several times until the tool moves freely.
- Thread the plug: push a plug strip halfway through the eye of the insertion tool so equal lengths hang either side.
- Insert the plug: push the tool and plug into the hole until only a short length of plug remains above the tread, then pull the tool straight out in one firm motion; the plug stays behind, its ends protruding.
- Trim and inflate: cut the protruding ends close to the tread with a blade, then inflate the tyre and check for leaks with soapy water again.
The reaming step is not optional. A plug forced into a ragged or undersized hole will not seal properly and can be ejected by tyre flex as the vehicle moves.
When a plug holds and when it does not
Punctures through the central tread area, away from the shoulders, respond best to plugs. The rubber is thicker there and the plug faces less sideways stress. A hole smaller than the diameter of a pencil usually plugs cleanly.
Sidewall punctures cannot be plugged safely. The sidewall flexes with every rotation and a plug will not hold under that movement. A puncture near the tyre shoulder, where the tread meets the sidewall, falls into the same category.
Multiple punctures close together weaken the structure too much for a plug to be trusted. A single large tear or a puncture that has already damaged the cords requires a spare or a full repair, not a field fix.
| Puncture location | Plug suitability | What to expect |
|---|---|---|
| Central tread | Good | Holds under moderate load and speed |
| Tread shoulder | Poor | Plug may work loose quickly |
| Sidewall | Unsafe | Flex will eject the plug |
| Multiple holes | Unsafe | Structure too compromised |
Signs the plug has failed or is about to
A hissing sound after insertion means the plug is not sealing. Pull it out, ream the hole again and try a fresh plug. If the second attempt also leaks, the puncture is too large or too irregular for a plug to work.
The tyre losing pressure over the course of an hour suggests the plug is slowly working its way out or the hole extends beyond what the plug can cover. Inflate again and watch the pressure closely; a plug that needs constant topping up has not solved the problem.
Vibration or a pronounced wobble after plugging points to a structural problem inside the tyre. The plug may be holding air, but the carcass is damaged enough that continuing is unsafe.
Reducing speed and load after a field repair
A plugged tyre should carry less weight and turn more slowly than an undamaged one. Halve the usual speed and avoid sharp corners or sudden braking. The plug can hold under gentle conditions but may fail if asked to cope with the same forces a sound tyre handles.
Move heavy kit to the other side of the vehicle if practical, so the plugged tyre supports less weight. Check the pressure every few hours; a plug that holds steady over that time is doing its job, but it is still temporary.
Plan the onward route to avoid terrain that will stress the repair. Rocks, deep ruts and steep descents all increase the chance of failure. If reaching a workshop means a detour on smoother ground, take it.
When to fit the spare instead
Fit the spare when the puncture is on the sidewall, when the plug will not seal after two attempts, or when the tyre shows bulging or cord damage around the hole. The spare is there for these situations; using it is not admitting defeat.
A plug that loses pressure within the first hour will not improve with time. Swap to the spare and carry the plugged tyre as the new spare if it can be reinflated, or secure it on the roof if it cannot.
What belongs in a field repair kit
A basic plug kit contains a reamer, an insertion tool and a strip of rubber plugs. Kits sold for motorcycles or cars work equally well for overland vehicles. Add a small bottle of soapy water or washing-up liquid for leak detection.
A portable air compressor or foot pump is essential; a plug that seals perfectly is useless if the tyre cannot be inflated afterwards. Carry a pressure gauge that reads accurately at the lower pressures used off-road.
A blade or multitool with a sharp edge trims the protruding plug ends. Gloves keep hands clean during the repair and protect against sharp wire exposed in the puncture. A headtorch or handheld light makes the job possible after dark.
Tools that extend what a plug can do
A tyre plug with a self-vulcanising coating bonds slightly to the tyre as it cures, improving the seal. These plugs cost more but hold better in marginal punctures.
A plug insertion tool with a T-handle gives better grip and control than a tool with a straight shaft. The extra leverage matters when pushing a plug through thick tread rubber.
For more involved recovery situations where a puncture leaves the vehicle immobilised, the recovery principles that apply to other scenarios also apply here.
Driving on a plug until a full repair is available
A plug that holds pressure and shows no leaks after half an hour can be trusted for moderate distances at reduced speed. Check the pressure before each day's travel and watch for any change in handling.
Avoid high speeds, heavy braking and sharp turns. The plug is under constant stress from tyre flex and heat build-up, both of which increase with speed and load. A plug that survives a slow crawl over rough ground may fail at higher speeds on tarmac.
Plan to have the tyre removed and inspected from the inside as soon as possible. A workshop will assess whether the puncture can be patched properly or whether the tyre needs replacing. Some punctures that plug successfully in the field cannot be repaired to a safe standard once inspected.
What a full repair involves and why it matters
A full repair requires the tyre to be removed from the rim so the inside surface can be prepared. The area around the puncture is buffed clean, an adhesive is applied and a patch is pressed into place. The patch spreads the load and seals the hole from the inside, where air pressure helps hold it in place rather than trying to push it out.
This method restores most of the tyre's original strength. A properly patched puncture in the tread can serve for the remaining life of the tyre. A plug inserted from the outside cannot make that claim.
Preventing punctures in terrain that causes them
Sharp rock, broken glass and thorn scrub all puncture tyres. Dropping tyre pressure before crossing rough ground reduces the chance of a puncture by allowing the tyre to absorb impacts rather than forcing sharp objects through the tread.
Watch the line the vehicle takes. Steering around obvious hazards is faster than repairing a puncture afterwards. Where the ground is littered with debris, slow down and pick a path that avoids the worst of it.
Tyres worn below half tread depth puncture more easily because there is less rubber between the road and the carcass. Replace tyres before they reach that point, especially if the journey ahead involves rough terrain.
Carrying more than one spare and when it makes sense
A second spare makes sense on journeys where workshops are scarce and the terrain is hard on tyres. Two punctures on one trip are uncommon but not rare, and a second spare removes the need to trust a field repair for the remainder of the journey.
The second spare adds weight and takes up space. Secure it on the roof, on a rear swing carrier or strapped inside if there is room. Make certain it is inflated to the correct pressure and in usable condition before departure.
Some travellers carry a matching set of tyres so any spare can go on any corner without concern for tread pattern or wear. Others carry one full-size spare and one space-saver or remould for emergencies. The choice depends on the distance from help and the acceptable level of risk.
Download PDF: Field puncture repair checklist PDF, 28 KB
Further reading
Frequently asked questions
How long does a tyre plug last in the field?
A plug holds long enough to reach a workshop or continue at reduced speed, often for several days if the puncture is in the central tread and the plug seals cleanly. It is not a permanent repair and should be replaced with a proper patch or a new tyre as soon as practical.
Can I plug a puncture on the sidewall of a tyre?
No. Sidewall punctures cannot be plugged safely because the sidewall flexes with every rotation and a plug will not hold under that movement. Fit the spare instead.
What tools do I need to repair a puncture off-road?
A plug kit with reamer and insertion tool, rubber plugs, a portable air compressor or pump, a pressure gauge, soapy water for leak detection, a blade to trim the plug ends and gloves. A headtorch helps if working after dark.