Driving steep descents is NOT the same as driving downhill on tarmac: gear, braking and line choice that prevent sliding
 Save
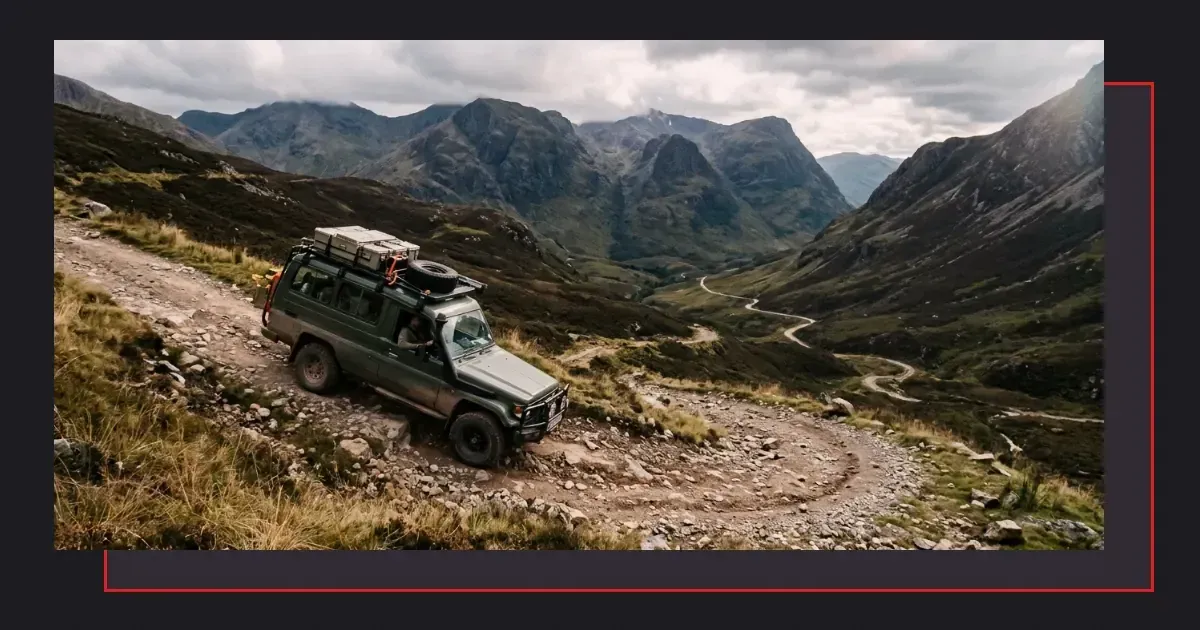
Driving steep descents off-road reverses everything you were taught about braking on tarmac. The engine holds the vehicle back; the brakes exist to trim speed, not to create all the stopping force. Cox Morgan Overland walks through gear selection, braking technique and line choice that keep control without locking the wheels or sliding sideways.
Select the gear before you commit to the slope
The transmission holds the vehicle on a steep descent, not the brakes. Choose the gear that allows the engine to spin fast enough to generate resistance but not so high that the vehicle races away. In low range, second or first gear suits most descents; in high range, first gear is the starting point for anything steeper than a mild gradient.
Change down before the slope steepens. Once the nose drops and weight shifts forward, changing gear becomes difficult and may force the clutch out of engagement at the moment braking effort is highest. Select the gear at the top, release the clutch smoothly and let the vehicle roll forward under engine braking alone.
A gear that feels too low will cause the engine to labour and may stall on rough ground. A gear that feels too high will let the vehicle accelerate until the brakes overheat. The correct gear holds a walking pace without any pedal input at all.
Use the brakes to trim speed, not to hold the vehicle
Brakes on a long descent generate heat faster than air can remove it. The engine does not overheat when used as a brake; the mechanical friction inside the transmission turns kinetic energy into heat that dissipates through metal and oil. Brake pads and discs have less mass and less cooling, so prolonged braking leads to fade.
Apply the brake pedal in short pulses to adjust speed rather than holding it down continuously. Each pulse brings the speed back to walking pace; releasing the pedal allows the components to cool slightly before the next application. The engine braking does most of the work; the brakes correct for variations in gradient and surface.
Locked wheels lose all directional control and may dig into soft ground or slide on loose rock. Threshold braking—applying pressure just below the point where the wheels lock—gives maximum stopping force while preserving steering. Modern vehicles with anti-lock systems will pulse the brakes automatically, but the principle remains: modulate pressure to keep the wheels turning.
Choose a line that avoids sudden changes in gradient
A smooth descent allows constant speed and even weight distribution across all four wheels. Sharp drop-offs, ruts and washouts force sudden braking or acceleration, both of which can break traction. Walk the slope beforehand to identify obstacles and plan a path that avoids them.
Driving straight down the fall line keeps weight balanced between left and right wheels. Traversing across the slope shifts weight to the downhill wheels and raises the risk of a sideways slide. If the direct line is blocked, pick a diagonal that minimises the sideways angle and corrects back to straight as soon as the obstacle is passed.
Large rocks and deep ruts can catch the underside of the vehicle or throw it off line. Straddle obstacles where clearance allows; where the track is too narrow, place one wheel on the high side of the rut to prevent the chassis grounding. Reading an off-road track before committing tells you which line offers the clearest path.
Hill descent control is not a replacement for understanding the principles
Electronic hill descent systems apply and release the brakes automatically to hold a preset speed, freeing the driver to concentrate on steering. The system works by monitoring wheel speed and applying individual brakes to prevent any wheel locking, much like anti-lock braking but calibrated for very low speeds on steep gradients.
Relying on the system without understanding gear selection and line choice leaves you helpless when the electronics fail or when the terrain exceeds the system's design limits. Steep, loose descents with deep ruts may cause wheel speeds to vary so much that the system cannot maintain control. In these conditions, manual control in low range gives finer adjustment.
Where the vehicle offers hill descent control, engage it at the top of the slope and allow it to manage brake pressure while you steer. If the vehicle begins to slide or the descent becomes rougher, disengage the system and take manual control. The system is a tool, not a guarantee.
Weight distribution changes as the nose drops
Descending a steep slope shifts weight forward onto the front axle. The rear wheels carry less load and lose traction more easily, especially on loose surfaces. Sudden braking worsens the shift and can lift the rear wheels off the ground on very steep gradients, removing all rear braking and steering.
Passengers and cargo positioned towards the rear help keep weight on the rear axle. A roof load raises the centre of gravity and makes the vehicle more prone to tipping if the descent includes a sideways tilt. Where a descent is both steep and off-camber, redistribute weight lower and further back before starting.
A vehicle with a long rear overhang will drag the back end on sharp transitions where the gradient changes suddenly from steep to flat. Approach these sections slowly to avoid grounding the rear bumper or damaging the exhaust. Where the transition is severe, stop before it and inch forward while watching the angle.
Stopping and restarting on a steep descent
Stopping on a steep slope is safer than committing to a line that may not work. Apply the footbrake to bring the vehicle to a halt, then hold it with the handbrake. In an automatic, leaving the transmission in drive with the footbrake applied is enough; in a manual, apply the handbrake and keep the clutch disengaged.
Restarting demands coordination between clutch, brake and throttle. Release the handbrake while holding the footbrake, then ease the clutch out until the vehicle begins to creep forward. The engine braking will hold the vehicle as soon as the clutch is fully engaged; release the footbrake only when the clutch is past the biting point.
If the vehicle begins to roll backwards during the restart, apply the footbrake immediately and start again. Rolling backwards on a steep slope risks sliding or striking an obstacle behind. Practice restarts on a gentle gradient before attempting them on steep descents.
Recognise when the descent is beyond the vehicle's capability
A descent too steep for the gear range will let the vehicle accelerate beyond the brakes' ability to hold it. A descent too loose will cause all four wheels to slide regardless of gear or braking technique. A descent too rutted or rocky will ground the chassis or puncture the sump. Recognising these limits before committing saves the vehicle and avoids injury.
If the slope looks doubtful, walk it first. Check the gradient, the surface and the obstacles, then decide whether the vehicle can manage it. If there is any doubt, find another route or turn back. Attempting a descent that fails halfway down leaves you stuck on a slope with few options for recovery.
Where recovery becomes necessary, safe recovery technique demands secure anchor points and the correct equipment. On a steep slope, winching from below is safer than trying to reverse uphill under power.
Following the steps in order
Steep descents demand preparation and discipline. Skipping any step increases the chance of losing control or damaging the vehicle. The sequence below applies to every descent, regardless of surface or gradient.
- Walk the slope to identify obstacles, choose a line and confirm the gradient is within the vehicle's capability.
- Select low range and the appropriate gear before the nose drops, ensuring the clutch is fully engaged.
- Release the brakes and allow engine braking to control speed, using the brake pedal only to trim speed in short pulses.
- Steer to follow the chosen line, keeping the vehicle straight down the fall line where possible and correcting gently for obstacles.
- Stop before any transition or obstacle if the line ahead is unclear, then inch forward once you have assessed the next section.
Surface conditions and their effect on braking
Loose gravel, mud and wet rock each respond differently to braking. Gravel allows the wheels to roll but offers little resistance to sliding once locked. Mud reduces traction across the entire contact patch and makes steering inputs slow to take effect. Wet rock provides almost no grip and rewards even pressure on both brake and steering.
| Surface | Braking character | Recommended gear |
|---|---|---|
| Dry gravel | Wheels bite well until locked, then slide easily | Second low |
| Wet mud | Continuous low grip; wheels spin or slide with little warning | First low |
| Wet rock | Almost no grip; any braking or steering risks a slide | First low, minimal braking |
| Sand | Wheels sink and drag; engine braking very effective | Second low, light throttle to maintain momentum |
Sand behaves differently from other loose surfaces. The wheels sink and create their own resistance, so engine braking alone may slow the vehicle too much and cause it to bog down. A small amount of throttle maintains momentum and prevents the wheels digging in, even on a descent.
Tyre pressure and tread pattern influence control
Lower tyre pressures increase the contact patch and improve grip on loose surfaces, but also raise the risk of the tyre rolling off the rim if the vehicle slides sideways. Higher pressures reduce the contact area and make the vehicle more prone to bouncing over rocks, which can break traction suddenly.
Tread designed for mud clears material from the contact patch but offers less grip on rock. All-terrain patterns compromise between the two and work across a wider range of surfaces. Choosing the right tyre depends on the terrain encountered most often, but no tread pattern compensates for poor technique on a steep descent.
What to do when the vehicle begins to slide
A slide begins when one or more wheels lose grip and the vehicle starts moving sideways or diagonally despite the steering input. The instinct to brake harder worsens the slide by transferring more weight forward and further unloading the rear wheels. Instead, ease off the brake pedal slightly to allow the wheels to turn and regain grip.
Steer gently in the direction the front of the vehicle needs to go, not against the slide. Sharp steering inputs on loose ground break traction on the front wheels and remove all directional control. Small corrections allow the tyres to find grip and bring the vehicle back onto the chosen line.
If the slide continues and the vehicle is moving towards an obstacle or a drop, stop completely and assess whether the descent is safe to continue. A vehicle that will not hold a line is telling you the conditions exceed its capability. Winching down from an anchor point above, or reversing back up the slope if the gradient allows, may be the only safe options.
Download PDF: Steep Descent Pre-Drive Checklist PDF, 25 KB
Further reading
Frequently asked questions
What gear should I use for a steep downhill off-road descent?
Use low range with first or second gear for most steep descents. The gear should hold the vehicle at walking pace without any brake input; if the engine labours, change up one gear.
Should I ride the brakes all the way down a steep slope?
No. Let the engine do the braking and use the brake pedal only in short pulses to trim speed. Continuous braking overheats the components and leads to brake fade.
What do I do if my vehicle starts sliding sideways on a descent?
Ease off the brake pedal slightly to let the wheels regain grip, and steer gently in the direction you want the front to go. Avoid sharp steering inputs or heavy braking, which will worsen the slide.